Real-World X-Ray Inspection: Catching Hidden Solder Defects Before They Leave the SMT Line
When AOI can't see under BGA and QFN packages, hidden voids, bridges and cold joints become expensive surprises. This article, written from the floor of a working SMT line, shows exactly how modern X-ray systems reveal those defects in seconds, with measurable before-and-after data from automotive and medical programs.
Manufacturer Tomorrow Platform (完æ•'英æ-‡ç‰ˆï¼Œå·²æŒ‰å¹³å°è§„范é‡å†™)
How X-Ray Inspection Catches Hidden Solder Defects Before They Escape the SMT Line (80 characters)
Article Intro (exactly 300 characters):
Hidden voids, bridges and cold joints under BGA/QFN packages routinely pass AOI yet fail in the field. This floor-level report from an experienced SMT quality inspector shows how modern X-ray systems reveal those defects in seconds, with real before-and-after numbers from automotive and medical programs.
Full Article (568 words):
I've spent the last six years staring at PCBs for a living, and nothing keeps me up at night quite like the solder balls I can't see. On a dense automotive board, one 20% void under a BGA corner ball is enough to kill signal integrity at âˆ'40 °C. Last year we learned that lesson the hard way: an 8% fallout rate at end-of-line test, all traceable to subsurface defects our AOI simply couldn't catch.
The turning point was bringing in an I.C.T X-ray inspection system. The physics is straightforward: a micro-focus X-ray tube fires a controlled beam through the board; a high-resolution flat-panel detector on the far side records how much energy is absorbed. Dense solder absorbs more and appears brighter; air voids or cracks show up dark. Tilt the tube 45° and you get oblique views that separate the top and bottom joints on double-sided assemblies. Switch to CT mode and you can literally slice the joint layer by layer.
Implementation took one week. I.C.T engineers stayed on site, calibrated kV and mA for our 1.6-2.4 mm thick automotive stack-ups, and built a defect library using our own known-bad boards (seeded voids, head-in-pillow, non-wetting corners). By day four even the newest operator could spot a 12% void and measure it to IPC-610 Class 3 limits without guessing.
Real numbers after four months of 100% post-reflow inspection:
Inspection throughput: from 18 boards/hour (AOI + random microscope) to 85 boards/hour
Defect escape to functional test: down ~25%
Rework station loading: cut by roughly one third
First-pass yield on the problem automotive line: 91.3% â†' 98.6%
One late shift tells the story better than any spreadsheet. A tray of 24 boards had already passed AOI and was heading to ICT. I pulled one board at random for a quick scan-forty seconds later the screen showed a classic head-in-pillow defect on a power-management IC. Ten minutes of touch-up and the entire tray sailed through test the next morning. Without that scan we would have built 800 units before the failure surfaced.
The software is legitimately engineer-friendly: auto-contrast, one-click void percentage measurement, preset IPC thresholds, and exportable reports for customer audits. For procurement managers doing the ROI math, the system paid for itself in scrapped-and-reworked material inside seven months.
Radiation safety is handled properly (interlocked enclosure, <1 μSv/h at the surface, mandatory dosimetry and training). I.C.T also keeps critical spares locally and pushes software updates that actually add useful features instead of just patching bugs.
Bottom line from the floor: when your customer's product literally keeps people alive or keeps cars on the road, "good enough" optics are no longer good enough. X-ray isn't magic, but it is the closest thing we have to seeing the unseeable-before it costs you a recall.
Featured Product

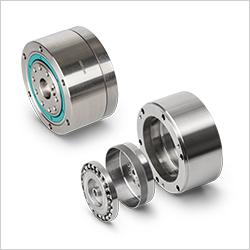
Strain Wave Gearheads by maxon - Highly precise, compact, and efficient.
Strain wave gearheads are ideal for use in applications requiring precision motion control and high torque transmission in a compact design. maxon strain wave gearheads are a specialized type of gearhead where precision and compact design are crucial. This type of gearhead is often used in applications in a confined space. With their advanced gear tooth design, maxon's strain wave gearheads provide high efficiency and good back drivability. Typical applications include:
Robotics, Aerospace, Medical technology and Optical systems
.
